Kubernetes Storage Without the Pain – Simplyblock in 15 Minutes
Apr 10th, 2025 | 14 min read
Whether you’re building a high-performance cloud-native app or running data-heavy workloads in your own infrastructure, persistent storage is necessary. In Kubernetes, this means having storage that survives pod restarts, failures, and rescheduling events—and that’s precisely what simplyblock brings to the table: blazing-fast, scalable, and software-defined storage with cloud economics. A hyper-converged storage solution, like simplyblock enables Kubernetes storage par excellence.
In this guide, we’ll show you how easy it is to install simplyblock in a hyper-converged Kubernetes cluster, where compute and storage live side-by-side. We’ll nerd out on the details, from CSI drivers to erasure coding, and even touch on data migration from existing persistent volumes.
📦 A Quick Primer on Persistent Storage in Kubernetes
Kubernetes wasn’t built with persistent storage in mind. Containers are designed to be ephemeral by default—once a pod is gone, its local data is gone, too. This is where PersistentVolumes (PVs) and PersistentVolumeClaims (PVCs) come in.
Initially, PVs and PVCs were built around built-in storage drivers as part of the Kubernetes core. Over time, though, this proved challenging to maintain. Storage vendors had release timelines apart from Kubernetes, and the number of new storage vendors that wanted to join in on Kubernetes was unmanageable with the in-tree approach.
That’s when the Kubernetes Container Storage Interface, or CSI for short, project was born. CSI is a driver interface for out-of-tree storage plugins, enabling Kubernetes to “remote-control” different storage systems and implementations through a standardized interface. Sidenote: Kubernetes isn’t the only system using CSI anymore.
Anyhow, a Persistent Volume (PV) is a piece of storage in the cluster provided statically by an admin or dynamically through a Storage Class (SC).
On the other hand, a Persistent Volume Claim (PVC) is a request of a specific application or user to provide and mount a piece of storage.
Being Kubernetes-first, simplyblock provides a fully compliant CSI driver that makes it dead simple to attach ultra-fast NVMe-backed volumes to your workloads.
🧱 Simplyblock Deployment Models
Simplyblock supports three deployment models: disaggregated, hyper-converged, and a hybrid of the two former. In this blog post, we will focus on the hyper-converged model. However, it is crucial to quickly understand the pros and cons of each model.
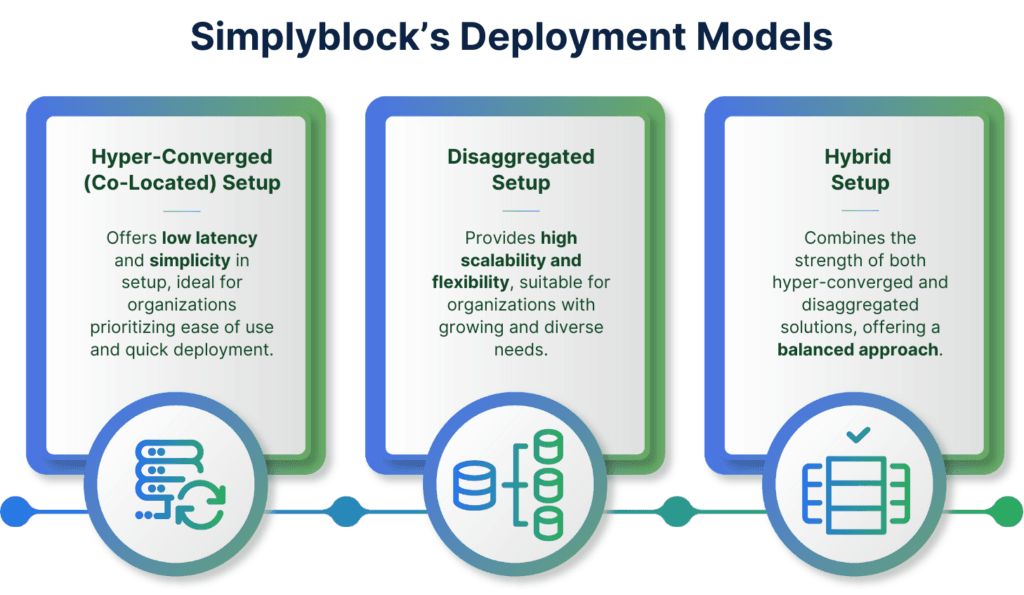
Disaggregated Deployment
In the disaggregated model, storage and compute are deployed on separate nodes. This is ideal when you want to scale storage independently from your application workloads. This model enables maximal storage density, throughput, and resource isolation.
When to use:
- Centralized storage serving multiple clusters or services.
- Large-scale environments where compute and storage lifecycles are managed independently.
- Use cases needing maximum performance, high-density storage, or where CPU/storage scaling diverges.
Hyper-Converged Deployment
In the hyper-converged model, each node runs both compute and storage workloads. Your application containers and storage services live side-by-side on the same physical infrastructure. This model offers access to features such as node affinity, which enables ultra-low latency access to local disks.
When to use:
- Edge environments or cloud-native clusters with tight coupling of compute and storage.
- Cost-sensitive deployments that aim to maximize hardware utilization.
- Fast, ultra-low-latency I/O paths due to local disk access.
Hybrid Deployment
The hybrid model combines the best of both worlds. Some nodes act purely as storage backends, while others are fully hyper-converged. Hybrid setups are great for mixed-type workloads. It combines the super low latency or the virtually native local disk access with the safety of a disaggregated setup and can quickly and seamlessly fail over to other workers.
When to use:
- Gradual migration from legacy to hyper-converged setups.
- Multi-tier storage strategies.
- Infrastructure with heterogeneous node capabilities (e.g., some nodes with lots of SSDs, others CPU-heavy).
🧠 Node Sizing and Architecture
Simplyblock is flexible — you can run it disaggregated (storage separate from compute) or hyper-converged. In this guide, we’re going hyper-converged, meaning:
- The same nodes that run your pods also contribute local storage to the cluster.
- Data is spread across multiple nodes using erasure coding, protecting against failures and maximizing efficiency.
Recommended Storage Node Specs
From the node sizing guide:
- vCPUs: At least 8 (16+ recommended for heavy workloads) ARM64 or x86_64
- Memory: Minimum 32 GB RAM
- Storage Devices: High-performance SSDs or NVMe
- Network: 10 Gbit/s or better, ideally with RDMA support for advanced deployments
🛠️ Installing Simplyblock (Hyper-Converged)
Installing the Control Plane
Before deploying Simplyblock inside your Kubernetes cluster, you must first install the control plane. This runs outside of Kubernetes as a dedicated management node on a standalone server or VM and is the central authority for managing the Simplyblock cluster.
Management nodes of the control plane have three primary functions:
- Cluster Manager: Maintains cluster membership, volume metadata, and handles orchestration.
- API Gateway: Used by the CLI, CSI driver, and other clients.
- Telemetry and Monitoring: Tracks the health and status of all cluster components.
The resource requirements for management nodes aren’t excessive and can easily be provided via VMs. However, the control plane should be highly available, hence, three nodes are the recommended minimum.
- 2 vCPUs
- 4 GiB RAM
- 10 GiB of free disk space
- x86_64 Linux (Debian or RHEL-based)
- Outbound internet access to fetch packages and images. If you need an air-gapped installation, see the documentation; it’s totally possible.
Installing Python and the Command-Line Interface
Before we begin, we need to install Python and pip, as well as the simplyblock command-line interface.
sudo yum -y install python3-pip
sudo pip install sbcli --upgrade
Installing the first Management Node
After that, you can run the quick check. While it doesn’t catch all issues, it quickly explains if the system should be compatible.
curl -L https://sblk.xyz/prerequisites | bash
If everything is green, we can go ahead with the installation. If there are checks that fail, see the complete documentation on how to configure firewalls and other components.
sbcli cluster create --ifname=<IF_NAME> --ha-type=ha
The parameter value for IF_NAME must be the ethernet interface for the control plane. Storage and control plane nodes have to have access to it.
A successful installation finishes with the cluster id. You can write this down as we need it later.
[demo@demo ~]# sbcli cluster create --ifname=eth0 --ha-type=ha
2025-02-26 12:37:06,097: INFO: Installing dependencies...
2025-02-26 12:37:13,338: INFO: Installing dependencies > Done
2025-02-26 12:37:13,358: INFO: Node IP: 192.168.10.1
2025-02-26 12:37:13,510: INFO: Configuring docker swarm...
2025-02-26 12:37:14,199: INFO: Configuring docker swarm > Done
2025-02-26 12:37:14,200: INFO: Adding new cluster object
File moved to /usr/local/lib/python3.9/site-packages/simplyblock_core/scripts/alerting/alert_resources.yaml successfully.
2025-02-26 12:37:14,269: INFO: Deploying swarm stack ...
2025-02-26 12:38:52,601: INFO: Deploying swarm stack > Done
2025-02-26 12:38:52,604: INFO: deploying swarm stack succeeded
2025-02-26 12:38:52,605: INFO: Configuring DB...
2025-02-26 12:39:06,003: INFO: Configuring DB > Done
2025-02-26 12:39:06,106: INFO: Settings updated for existing indices.
2025-02-26 12:39:06,147: INFO: Template created for future indices.
2025-02-26 12:39:06,505: INFO: {"cluster_id": "7bef076c-82b7-46a5-9f30-8c938b30e655", "event": "OBJ_CREATED", "object_name": "Cluster", "message": "Cluster created 7bef076c-82b7-46a5-9f30-8c938b30e655", "caused_by": "cli"}
2025-02-26 12:39:06,529: INFO: {"cluster_id": "7bef076c-82b7-46a5-9f30-8c938b30e655", "event": "OBJ_CREATED", "object_name": "MgmtNode", "message": "Management node added vm11", "caused_by": "cli"}
2025-02-26 12:39:06,533: INFO: Done
2025-02-26 12:39:06,535: INFO: New Cluster has been created
2025-02-26 12:39:06,535: INFO: 7bef076c-82b7-46a5-9f30-8c938b30e655
7bef076c-82b7-46a5-9f30-8c938b30e655
Installing Secondary Management Nodes
The process is very similar on secondary management nodes. First, we install Python, pip, and the command-line interface. Then, we add the management node to the control plane cluster.
However, before that, we need the cluster secret to enable secondary nodes to join.
[root@vm11 ~]# sbcli cluster get-secret 7bef076c-82b7-46a5-9f30-8c938b30e655
e8SQ1ElMm8Y9XIwyn8O0
Now, we install the secondary node.
sudo yum -y install python3-pip
pip install sbcli --upgrade
sbcli mgmt add <CP_PRIMARY_IP> <CLUSTER_ID> <CLUSTER_SECRET> <IF_NAME>
The values for CP_PRIMARY_IP, CLUSTER_ID, CLUSTER_SECRET, and IF_NAME must be given to join the requested control plane cluster.
[demo@demo ~]# sbcli mgmt add 192.168.10.1 7bef076c-82b7-46a5-9f30-8c938b30e655 e8SQ1ElMm8Y9XIwyn8O0 eth0
2025-02-26 12:40:17,815: INFO: Cluster found, NQN:nqn.2023-02.io.simplyblock:7bef076c-82b7-46a5-9f30-8c938b30e655
2025-02-26 12:40:17,816: INFO: Installing dependencies...
2025-02-26 12:40:25,606: INFO: Installing dependencies > Done
2025-02-26 12:40:25,626: INFO: Node IP: 192.168.10.2
2025-02-26 12:40:26,802: INFO: Joining docker swarm...
2025-02-26 12:40:27,719: INFO: Joining docker swarm > Done
2025-02-26 12:40:32,726: INFO: Adding management node object
2025-02-26 12:40:32,745: INFO: {"cluster_id": "7bef076c-82b7-46a5-9f30-8c938b30e655", "event": "OBJ_CREATED", "object_name": "MgmtNode", "message": "Management node added vm12", "caused_by": "cli"}
2025-02-26 12:40:32,752: INFO: Done
2025-02-26 12:40:32,755: INFO: Node joined the cluster
cdde125a-0bf3-4841-a6ef-a0b2f41b8245
Installing the Storage Plane
It’s finally time to get the storage cluster running 🎉
Preparing the Helm Repository
First, we need to register the simplyblock helm chart repository. Obviously, you need to have helm installed. If you don’t, follow the helm installation before you keep going here.
helm repo add simplyblock https://install.simplyblock.io/helm
helm repo update
Load the NVMe/TCP Driver
Now let’s make sure that the NVMe over TCP (NVMe/TCP) driver is loaded on the Kubernetes workers. The NVMe over TCP driver itself is part of the standard Linux kernel, but not loaded by default.
To quickly test the driver, let’s load it temporarily.
modprobe nvme-tcp
That should have loaded the NVMe/TCP driver itself, as well as the NVMe over Fabrics (NVMe-oF) driver. We can easily check that by asking for Linux kernel for all loaded driver modules.
lsmod | grep 'nvme_'
This should result in an output very similar to the following:
[demo@demo ~]# lsmod | grep 'nvme_'
nvme_tcp               57344  0
nvme_keyring           16384  1 nvme_tcp
nvme_fabrics           45056  1 nvme_tcp
nvme_core             237568  3 nvme_tcp,nvme,nvme_fabrics
nvme_auth              28672  1 nvme_core
t10_pi                 20480  2 sd_mod,nvme_core
The important ones are nvme_tcp and nvme_fabrics. Make sure those two show up in the result. If they do, yay!
But since it’s only a temporary load, let’s make that change persistent and load them automatically at boot time.
If you’re on a Debian-based system (yes, I’m a Debian fan), just add it to /etc/modules.
echo "nvme-tcp" | sudo tee -a /etc/modules
On Red Hat-based systems, it’s just as simple, though.
echo "nvme-tcp" | sudo tee -a /etc/modules-load.d/nvme-tcp.conf
After the change, you should reboot the system and run the lsmod command again to see that the drivers are really loaded.
Deploy the Helm Chart
Before we can kick off the helm chart installation, we quickly need to collect a few values that are required to connect the storage plane with the cluster definition in the control plane. If you’ve written some of them down during the control plane installation, just skip the step.
The first value we need is the cluster id. Since a single control plane can control multiple storage clusters, the correct cluster id needs to be used.
The easiest way is to ask on the management node for all available clusters.
[demo@demo ~]# sbcli cluster list
+--------------------------------------+-----------------------------------------------------------------+---------+-------+------------+---------------+-----+--------+
| UUID                                 | NQN                                                             | ha_type | tls   | mgmt nodes | storage nodes | Mod | Status |
+--------------------------------------+-----------------------------------------------------------------+---------+-------+------------+---------------+-----+--------+
| 7bef076c-82b7-46a5-9f30-8c938b30e655 | nqn.2023-02.io.simplyblock:7bef076c-82b7-46a5-9f30-8c938b30e655 | ha      | False | 1          | 4             | 1x1 | active |
+--------------------------------------+-----------------------------------------------------------------+---------+-------+------------+---------------+-----+--------+
So, for our example, 7bef076c-82b7-46a5-9f30-8c938b30e655 is the cluster id we’re looking for.
Next up, we need the cluster secret to prove that we are allowed to join the storage plane. Again, this can be done using the command-line tooling on any node of the control plane.
[demo@demo ~]# sbcli cluster get-secret 7bef076c-82b7-46a5-9f30-8c938b30e655
e8SQ1ElMm8Y9XIwyn8O0
We see that e8SQ1ElMm8Y9XIwyn8O0 is our secret.
Last, we need the storage pool name created in the previous section.
[demo@demo ~]# sbcli storage-pool list
+--------------------------------------+-------+----------+----------+---------------+-------+-------+--------+
| UUID                                 | Name  | Capacity | Max size | LVol Max Size | LVols | QOS   | Status |
+--------------------------------------+-------+----------+----------+---------------+-------+-------+--------+
| 4357ea15-cdd1-41e2-b8f6-dfce2c02f6ff | pool1 | 0 B      | 0 B      | 0 B           | 0     | False | active |
+--------------------------------------+-------+----------+----------+---------------+-------+-------+--------+
The storage pool name is pool1. With that, we have all the necessary values.
Installing the storage cluster is now as simple as giving the necessary values to the helm chart during installation.
CLUSTER_UUID="7bef076c-82b7-46a5-9f30-8c938b30e655"
CLUSTER_SECRET="e8SQ1ElMm8Y9XIwyn8O0"
CNTR_ADDR="http://192.168.10.1/"
POOL_NAME="pool1"
helm install -n simplyblock-csi \
    --create-namespace simplyblock-csi \
    simplyblock-csi/spdk-csi \
    --set csiConfig.simplybk.uuid=<CLUSTER_UUID> \
    --set csiConfig.simplybk.ip=<CNTR_ADDR> \
    --set csiSecret.simplybk.secret=<CLUSTER_SECRET> \
    --set logicalVolume.pool_name=<POOL_NAME> \
    --set storagenode.create=true
This will start the installation process. Eventually, helm should tell you that the installation was successfully run. At this point, we can list the pods and see the storage cluster coming up.
demo@demo ~> helm install -n simplyblock-csi \
  --create-namespace simplyblock-csi simplyblock-csi/spdk-csi \
  --set csiConfig.simplybk.uuid=${CLUSTER_UUID} \
  --set csiConfig.simplybk.ip=${CNTR_ADDR} \
  --set csiSecret.simplybk.secret=${CLUSTER_SECRET} \
  --set logicalVolume.pool_name=${POOL_NAME}
NAME: simplyblock-csi
LAST DEPLOYED: Wed Mar  5 15:06:02 2025
NAMESPACE: simplyblock-csi
STATUS: deployed
REVISION: 1
TEST SUITE: None
NOTES:
The Simplyblock SPDK Driver is getting deployed to your cluster.

To check CSI SPDK Driver pods status, please run:

  kubectl --namespace=simplyblock-csi get pods --selector="release=simplyblock-csi" --watch
demo@demo ~> kubectl --namespace=simplyblock-csi get pods --selector="release=simplyblock-csi" --watch
NAME                   READY   STATUS    RESTARTS   AGE
spdkcsi-controller-0   6/6     Running   0          30s
spdkcsi-node-tzclt     2/2     Running   0          30s
And that’s it 🎉
The CSI driver is automatically registered during the installation, and your storage nodes are part of a robust, high-performance cluster.
⚡ Performance & Networking Tips
To ensure a smooth ride, there are some things you should keep in mind when building your storage infrastructure.
- Avoid CPU pinning for storage threads unless you’re tuning for edge performance.
- Prefer NUMA-aware deployments for large systems.
- Use MTU 9000 (Jumbo Frames) if your network supports it — this reduces packet overhead.
- For public cloud deployments, you might need to disable automatic detection of link-local addresses.
- Network can’t be fast enough, get what you can 😁
Check out the network considerations for more deep-dive tuning.
📁 Migrating Existing Persistent Volumes
If you’re not starting from scratch but have existing volumes you want to migrate, the simplyblock documentation lists different options. The easiest way is to mount old and new into the same pod while running a rsync or dd. The latter is required for raw block devices, while the former is for files.
If you have the chance to create snapshots or full backups that can be replayed, or you run a database backup tool such as pgbackrest, just start a new instance and have it replay the backup or snapshot onto the new volume.
Last, there is a heavily involved, slightly more dangerous, but almost no-downtime method. To describe how it works would go beyond the scope of the blog post. Maybe it’s a good idea for a later one. See the documentation for more details.
🧪 Ready to Dive In?
Simplyblock on Kubernetes is built for modern, demanding workloads — fast, cloud-native, and designed to scale with you. By deploying it hyper-converged, you get maximum performance with minimal complexity.
Need more control? You can explore hybrid and disaggregated models later. For now, kick the tires on this hyper-converged setup and see the speed for yourself. And remember, you can add disaggregated nodes later, making it a hybrid setup for extended fault tolerance.
👉 Check out the full Kubernetes deployment docs for all the gory details.
Happy hacking!